Shaders are a critical part of a game’s style. Lightning, shadows, and spell effects all require shaders.
LibGDX provides access to LWJGL’s ability to create GLSL ShaderProgram’s, compile them, and apply them during rendering. They have a default shader for batch 2d rendering.
Most engines provide a substantial overhaul to shaders, things like…
- Access to data (like unit positions, lights, etc). Frag and vertex shaders have very little data unless you provide it.
- Common library functions. Writing shaders involves a lot of common operations that don’t exist in GLSL unless written.
- Shader pipeline. Pipelines allow multiple shaders to be layered/combined into an overall effect
- Often these effects are chained to create incredibly complex math operations without writing any code.
In most engines, you don’t write GLSL. You use a UI to make a pipeline for cool effects.
Welp, I chose to not have any of that. So I guess it’s time to learn GLSL.
OOOOHHH BOY.
Let’s just write a shader
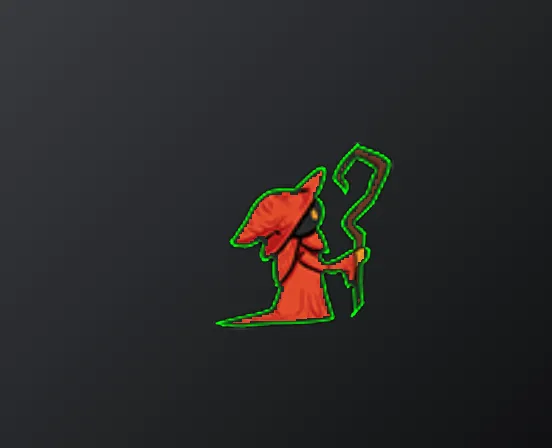
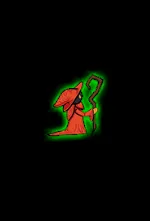
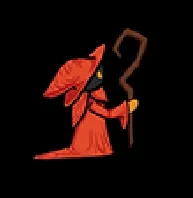
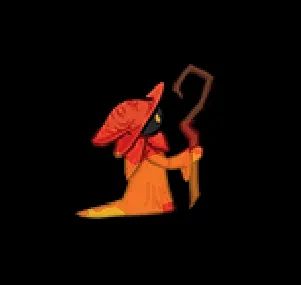
The first shader I wanted to write was for a selection effect. Up until now, we’ve been using a green blob below the mages’ feet. It doesn’t look good. I wanted to have a green outline around the mages, but to do that programmatically, you need to know the texture data.
My sister offered to just add a photoshop outline onto every sprite, but I told her no — we HAVE the technology.
So, how do you make an outline?
First, I have to detect what an edge is. When it comes to an image, I’m looking for the transition between high alpha values and low alpha values. Once I find that location, I just color the clear pixels near the full pixels.
It’s a fragment shader, so it runs for every pixel. For each pixel, I check all pixels surrounding me, and if our overall alpha value is low, I apply the outline to this pixel.
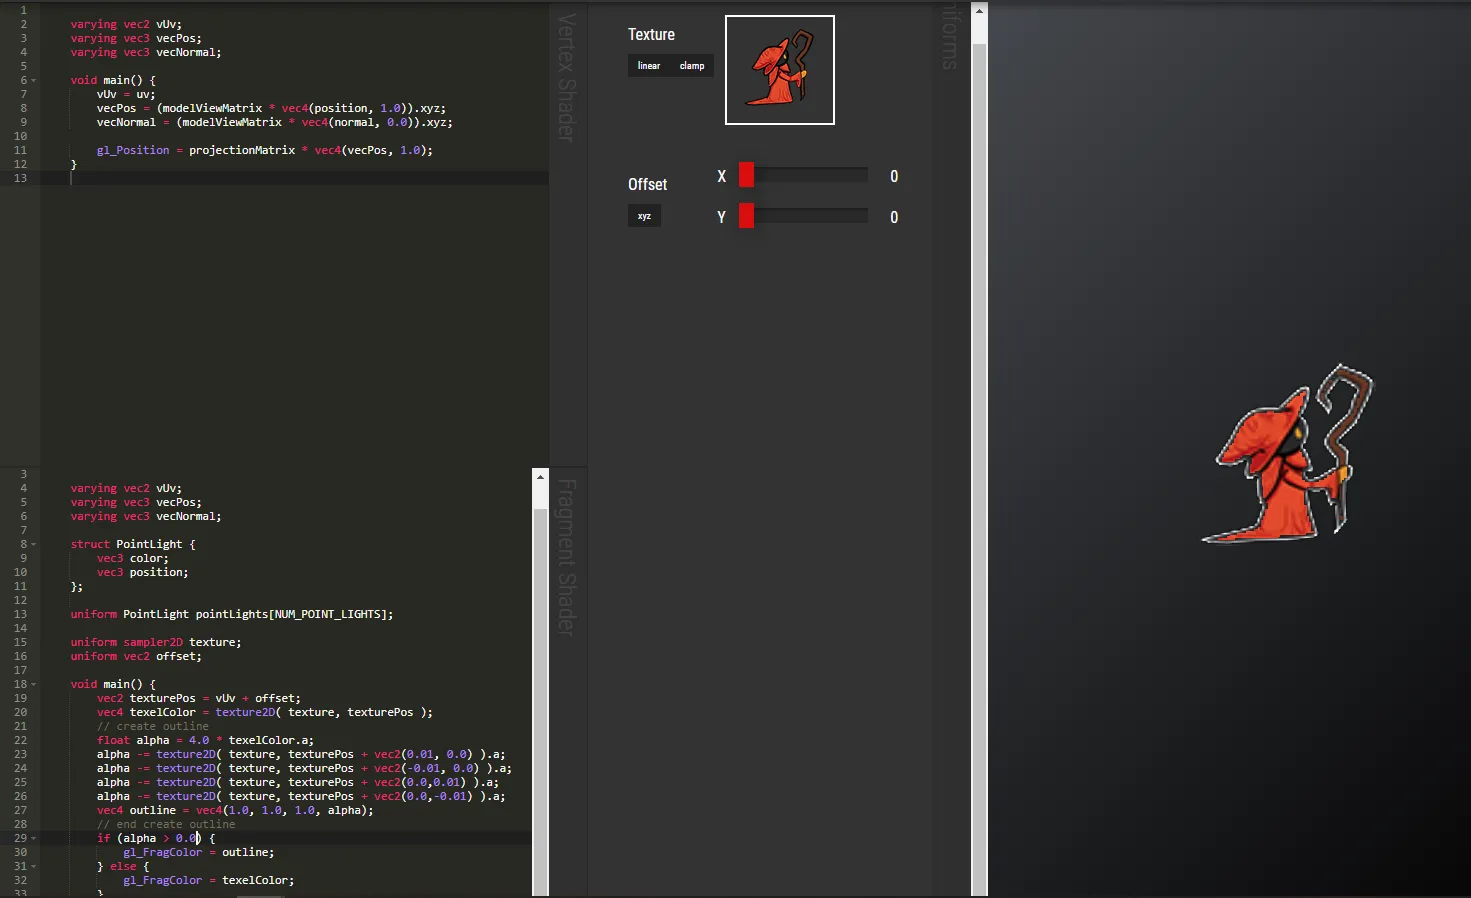
void main() {
    // find the texture position and color from libgdx data
    vec2 texturePos = vUv + offset;
    vec4 texelColor = texture2D( texture, texturePos );
    // check all of the pixels near me to see what their alpha values are
    alpha -= texture2D(texture, texturePos + vec2(0.01, 0.0)).a;
    alpha -= texture2D(texture, texturePos + vec2(-0.01, 0.0)).a;
    alpha -= texture2D(texture, texturePos + vec2(0.0, 0.01)).a;
    alpha -= texture2D(texture, texturePos + vec2(0.0, -0.01)).a;
    // outline is based on the cumulative alpha score
    vec4 outline = vec4(1.0, 1.0, 1.0, alpha);
    if (alpha > 0.0)
        gl_FragColor = outline;
    else
        gl_FragColor = texelColor;
}
This actually worked pretty well. Smooth sailing.
It was not smooth sailing.
-Kittems from the future
There were a few things I wanted to improve
- The selection line is pretty pixalted and overlaps with the image a bit much
- It should be green
Well, green is at least easy.
Let’s add some blur
The issue is that I have a stark line, I just need to lerp the outline values across the threshold and I can get it smoothed out.

Okay, that did not work.
It did the opposite of what I wanted, it smoothed the outline inward. I must’ve simply just made a mistake in my math when I was blending to blend towards high alpha values. Let me fix that.

Shaders are hard to debug.
A rant about shader debugging
It is 2021 and we have tools that can literally rewind browsers into previous state, snap full network logs, collect telemetry data across a thousand k8s pods and parse it into WYSIWYG dashboards in realtime (ala Kibana).
So there must be some amazing tools for debugging GLSL, which has been around since 1992, right?
> google: "how do i debug shaders"
> "color a pixel a specific shade to indicate behavior"
> google: "debug log print GLSL"
> "not an option, I recommend coloring a pixel a specific---
> google: "debug tools GLSL"
> "I've always just colored a pixel a specific shade."
Hm, that is unfortunate. Maybe there’s some nice libraries I could import in my shader to do this kind of stuff even if it isn’t native.
> google: "glsl shader libraries"
> "GLSL does not support importing other GLSL functions"
WHAT.
GLSL does not support importing other GLSL code. I recommend adding an #include macro to your game engine, or just copy and paste functions between files.
I wondered but how do other people do this? And then I remembered that engines have these beautiful
pipelines that handle GLSL compilation. They probably wrote their own #include for their engine. I just
cannot believe how little open source tooling there is for GLSL and shader pipelines.
Okay, so, I guess I’ll color a pixel a specific shade…
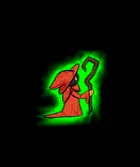
For now, I’ll actually use this green state for a future poisoned shader. A happy little accident. Right? Right!?
Let’s take a break from shader writing before I lose my mind.
In-game Shader Support
Let’s actually add shader support to my RenderSystem.
Swapping out shaders with LibGDX’s SpriteBatch ended out being pretty simple. I added a simple
“make everything brighter” shader (sorry darkmode):
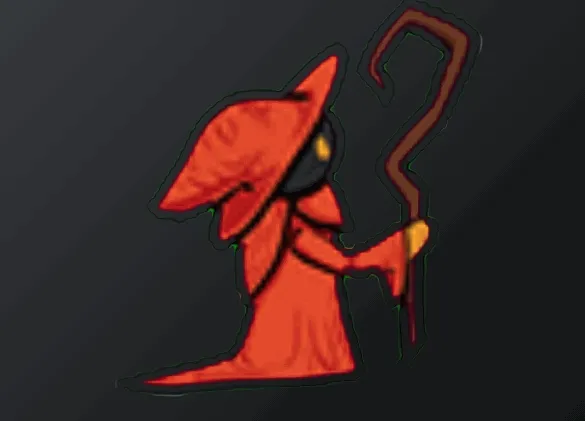
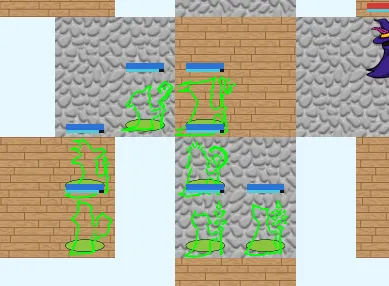
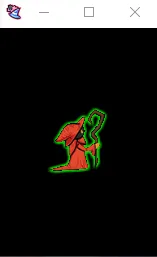
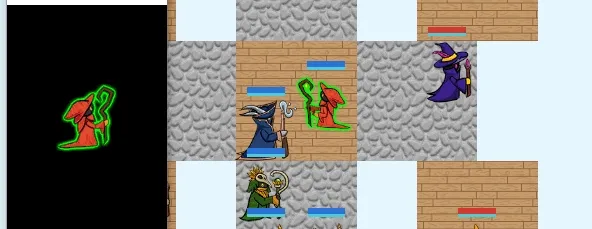
I decided to try to add my Selection shader onto specific mages, I chose to use my previous outline frag shader without the blur. And it was not okay.

In order to add my own shaders, I had to change LibGDX’s default shader. SpriteBatch did a lot of magic
for me, and now I had to feel the pain of that magic.
Nope. Forgot the passthru texture.
FINALLY! Selection mostly works.
During this process, I figured out that if I’m going to use any custom variables my engine passes to GLSL, I’ll need to use tools that support those custom variables.
AKA, I need to write my own shader pipeline tool.
Shader Editor
It’s a simple editor. It watches the /assets/shaders folder, and when the file changes,
it attempts to recompile the ShaderProgram. I am using my RenderSystem with a baseline entity
so that I can have access to my specific variables (like lights, unit data) in GLSL.
If I have a compile-time error, it shows the error, and keeps the old ShaderProgram.
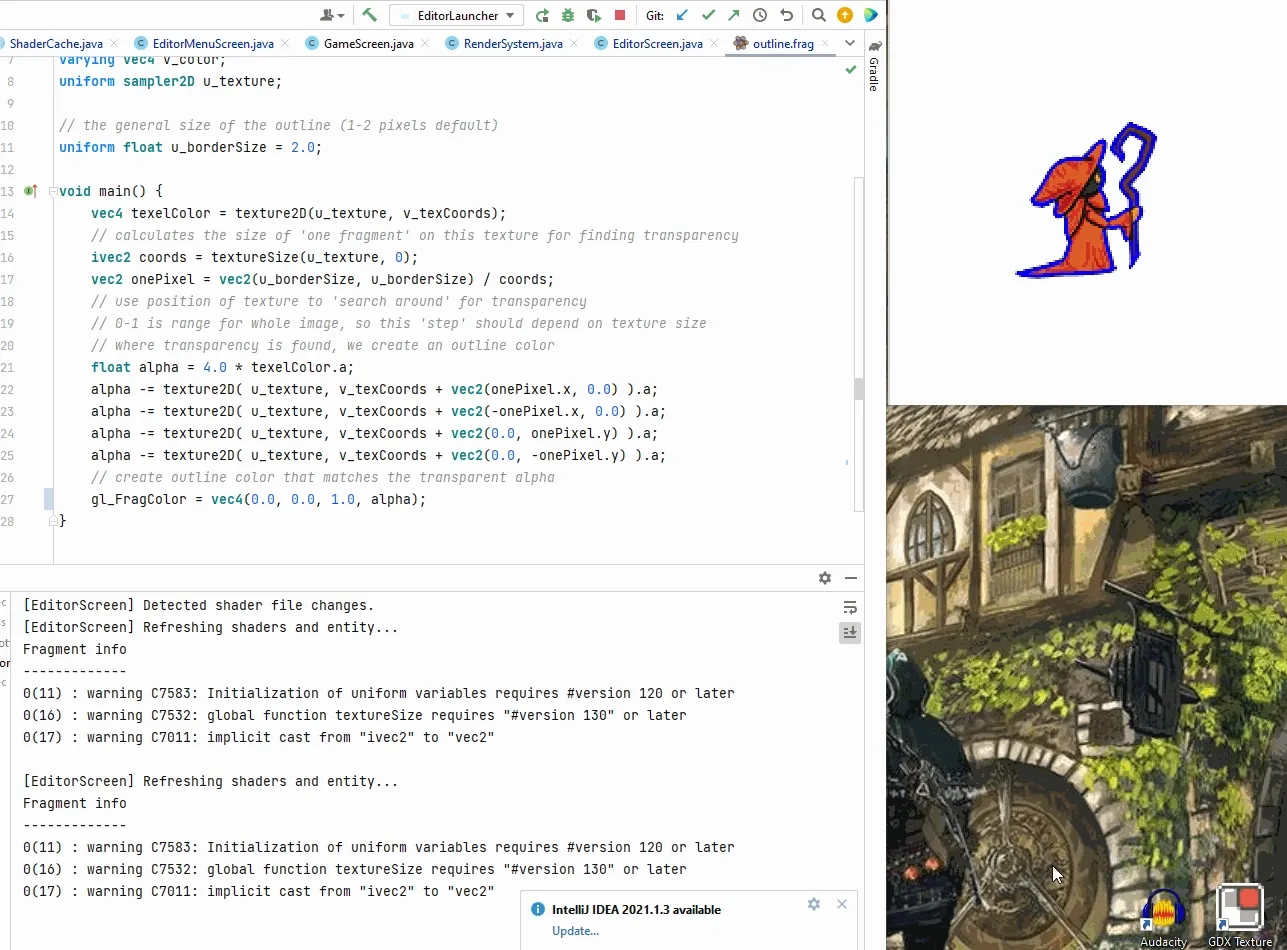
This devtool helped immensely improve the debugging experience.
Fixing the Selection Shader
With this devtool, seeing my changes in near-real-time, I figured out why my blur was not working.
- I used a random value (0.01) for the fragment size on the texture, but this did not scale between textures.
- I did not check diagonal pixels, which meant corners were always sharp
- My lerp had a math mistake :))))
I was able to get the blur! I used a step process that iteratively checked further out to determine the current outline amount.
void main() {
    vec4 texelColor = texture2D(u_texture, v_texCoords);
    // calculates the size of 'one pixel' on this texture for finding transparency
    // my previous 0.01 float value did not scale properly on different size sprites.
    ivec2 coords = textureSize(u_texture, 0);
    vec2 onePixel = vec2(u_borderSize, u_borderSize) / coords;
    // use position of texture to 'search around' for transparency
    // 0-1 is range for whole image, so this 'step' should depend on texture size
    // where transparency is found, we create an outline color
    float alpha = 0.0;
    int steps = 2;
    if (texelColor.a <= 0.99) {
        alpha = 0.0;
        // we iterate further pixels away each time, but weight less, to create a blur
        for (int i = 1; i <= steps; i++) {
            float px = float(i);
            // search +x -x
            float step = 0.0;
            step += texture2D(u_texture, v_texCoords + vec2(onePixel.x * px, 0.0)).a;
            step += texture2D(u_texture, v_texCoords + vec2(-onePixel.x * px, 0.0)).a;
            // search +y -y
            step += texture2D(u_texture, v_texCoords + vec2(0.0, onePixel.y * px)).a;
            step += texture2D(u_texture, v_texCoords + vec2(0.0, -onePixel.y * px)).a;
            // search diags
            step += texture2D(u_texture, v_texCoords + vec2(onePixel.x * px, onePixel.y * px)).a;
            step += texture2D(u_texture, v_texCoords + vec2(-onePixel.x * px, onePixel.y * px)).a;
            step += texture2D(u_texture, v_texCoords + vec2(onePixel.x * px, -onePixel.y * px)).a;
            step += texture2D(u_texture, v_texCoords + vec2(-onePixel.x * px, -onePixel.y * px)).a;
            // weight each iteration less to give blur effect
            alpha += step / px;
        }
        // we perform 4 iterations, don't let alpha go above 1.0
        alpha = min((alpha / float(steps)), 1.0);
        // to blend nicely and not create harsh lines, remove proportional based on alpha (% to remove)
        alpha = max(alpha - texelColor.a * 0.75, 0.0);
    }
    // create outline color that matches the transparent alpha
    gl_FragColor = vec4(u_borderColor, alpha);
}
I could use these static variables I introduced to control the blur, and after days of debugging shaders, I cannot tell you how happy this made me. Playing around with it was fun after it worked:

And here it is in game!
I have learned the sacred art
Was this experience painful? Absolutely.
Was this a good use of my limited development time? Absolutely not.
And yet, having crested onto the first summit, I am giddy with excitement. Writing GLSL is laborious and impossible to debug, but the results feel tangible. I feel like I could go write my own lighting system now. I can get any game data I need, and I can add any appearance I want. I feel like I know a low level secret. It’s not a secret, of course, but it feels like I just unlocked a new power.
So I immediately wrote my next shader. An ‘on-fire’ effect.
And using the power of a time variable and a lot of sins/cosines, I added a gradient.
BEHOLD the power of SHADERS:

Compared to selection, this shader only took me a little under an hour.
All right, back to core game mechanics.